Materials needed:
Size G or H crochet hook
Scraps of worsted weight yarn
Scissors
Yarn needle
Notes:
Feel free to be creative with your colors. You can use a different color for the body and wings or outline the wings in a different color by changing to a different color yarn on row 2 of the wings. Get creative and have fun!
Abbreviations:
Ch = chain
sc = single crochet
dc = double crochet
trc = treble crochet
sl st = slip stitch
st(s) = stitch(es)
Instructions:
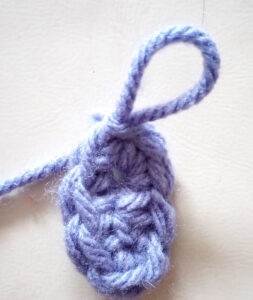
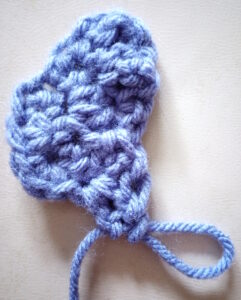
With body color, ch 4.
Sc in second ch from hook and next ch, 3 sc in next ch moving around the ch to other side, sc in next 2 ch, 3 sc in last ch.
Join to first st with a sl st. (10 sts)
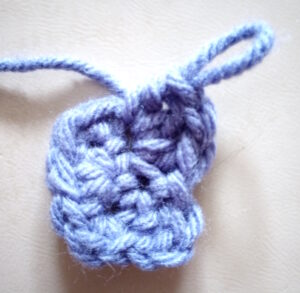
Change to a different color for wings at this point, if desired.
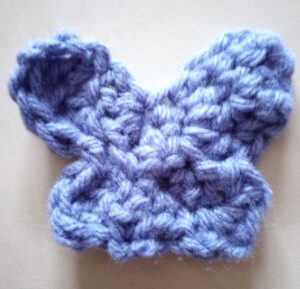
Wing #1:
Row 1: ch 2 (counts as dc), dc in same st, 1 sl st in next st, 3 dc in last st. Turn.
Row 2: ch 3 (counts as trc), trc in same st, 2 trc in next st (makes the top of wing), 1 sl st in next st, 1 dc in next 3 sts (makes the bottom of wing).
At this point, sl st 4 sts across to the other side of the butterfly’s body on the bottom side.
Wing #2:
Row 1: ch 2 (counts as dc), dc in same st, 1 sc in next st, 3 dc in last st. Turn.
Row 2: ch 3 (counts as trc), trc in same st, 2 trc in next st (makes the top of wing), sl st in next st, 1 dc in next 3 sts (makes the bottom of wing)
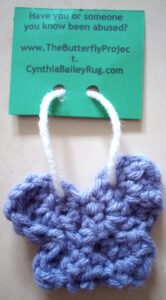
Your completed butterfly will look much like this:
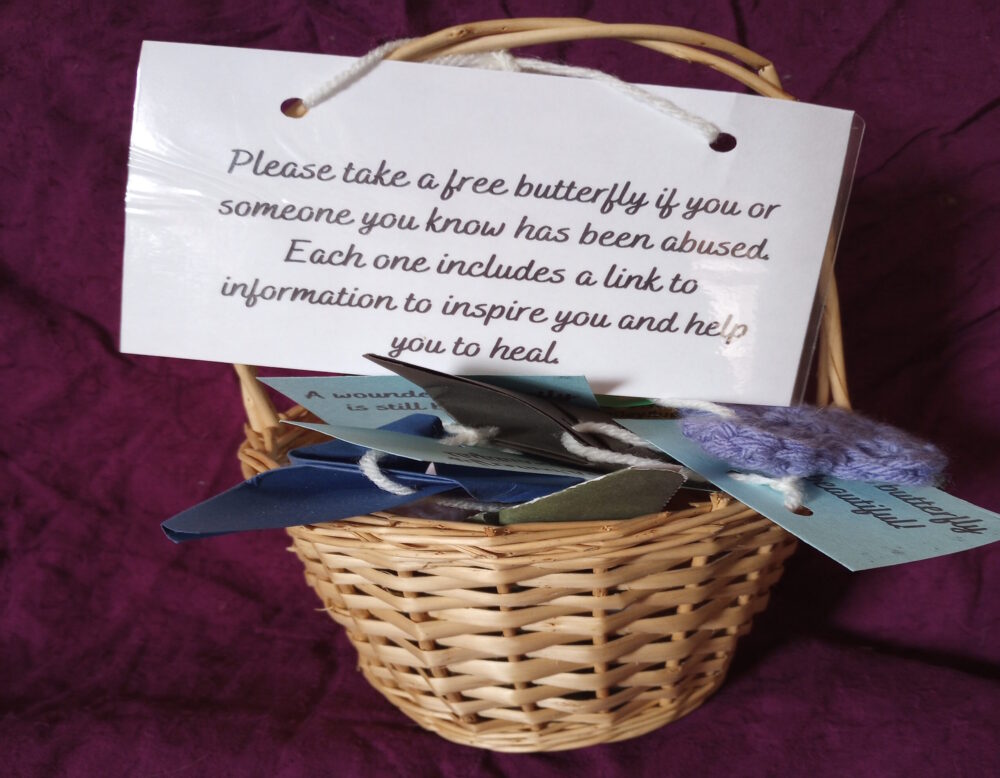
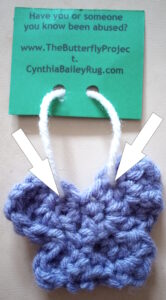
Now, print and attach The Butterfly Project tags with a piece of yarn or ribbon. Weave the yarn in stitches at the end of one wing, go in through stitches at the top of the body and again at the opposite wing like in the picture below to help your butterfly lay flat.
Now pray for the butterfly’s recipient, and leave it in a public place to be found.